It’s been a few weeks since I reported in and the question is, how is the camper build going? To find out, continue reading.
There hasn’t been a lot of cycling in recent weeks. What trips there has been were mostly “down to the shops” in between rain showers although we did have one brilliant cycling day and rode out to Carrick to keep the cycling muscles fired up.
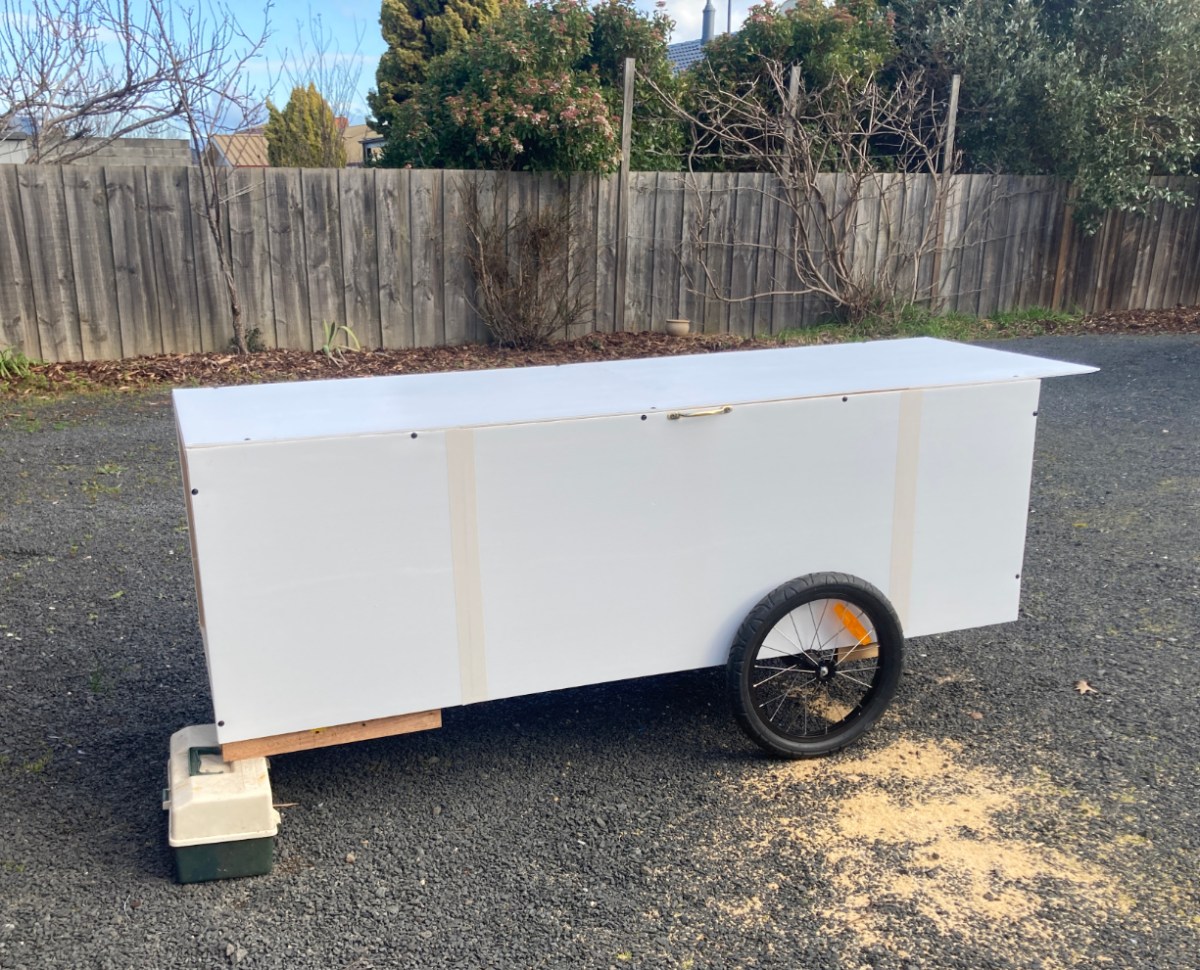
The Beriault Camper build continues.
I have spend quite some time on developing levels 1 and 2 since the last report. The push outs needed for the foot and side have been built. I was wondering what size aluminium strips I would need to fit to stop the push outs from pushing all the way out. Then Colin turned up with some stainless angles that were perfect for the job – and I got to use the angle grinder to cut them to size.


After fitting the push outs I spend quite some time lying about in the camper testing it and imagining being on a trip! Would the Exped air mat fit? (just); could I turn onto one side and then the other? (yes); was it long enough? (Just); was there enough room at the shoulders?(I think so). With air mat, pillow and feet stretched to the end of the foot push out it’s pretty comfortable but I don’t like to move about too much using my feet in the push out zone – it feels a bit loose and like things will come apart! I added some reinforcement panels and time will tell.
The sun was out, the wind was somewhere else and it was all sleep inducing lying tucked into the camper BUT there was more work to be done.

I cut down 3 of the boxes used last summer in the original trailer and adapted them to fit in the side push out. I was thinking I will just use dry bags to hold stuff in the foot push out. That was plan anyway but second thoughts included the need to get heavy stuff over the axle and this will drive payload organisation.
I also made window openers from stainless steel welding rods but didn’t like the end result. For now I have fastened the windows with velcro dots and plan to develop window openers similar to those found on modern vented tents. That’s something for down the road.
Now it’s time to tackle Level 3 – the all important Hood

The design calls for laminated beams running from the back wall to the front providing a gentle curve at the front. I got into a bit of analyst / paralysis about this. It would need wood for a jig, lengths of timber that I can’t get into the car and many, many clamps. Some of this I know Colin would help with but then, one rainy afternoon in the shed I thought, perhaps just building a box shape would be easier. I looked at what would be needed and found I already have the wood. No jig would be needed and just a few clamps – I have everything to get going! OK, let’s go that way.
And I did.
Nothing is plain sailing though as I found out after building the framework for the rear wall and attaching it to the level 2 back wall.
The idea is that the hinged rear walls of level 2 and level 3 provide an articulated movement allowing the hood to be used to cover level 1 while travelling and then raised to form level 3 when camping.
I connected the rear walls of levels 2 and 3 together using a “proper” hinge rather than a coreflute hinge.

My lack of skills with hinges showed up right away! I had the hinge too low and it interfered with the joining of the side walls with the rear wall.

Having got the L2 and 3 rear walls connected properly, I continued to put together the framework to make sure the articulation works.


So I continued along this path adding cross beams and then scrap Coreflute at the back and front to hold the walls square. Yes the articulation worked BUT the coreflute on the hood sides hit the walls – the top was too narrow! Why was this so? Well, after some looking and thinking and a supportive Guiness or two I worked it out. Robert had used 4mm coreplast for his sides plus flat headed screws. I had 5mm coreflute and domed screws which meant my sides were wider.
I decided to remove the domes screws and replace with flat headed ones but I couldn’t find any suitable screws in Bunnings. There may well be some in that very large shop but I couldn’t find them. So the domed headed jobbies are still in the camper.
What to do?
Well, add extra width to the end walls and the cross beams of course. Nothing was glued at this time so that wasn’t too hard.
Hood test #2. The scrap coreflute didn’t hit the sides. A result. The hood sat awkwardly on the folded sides though when in travel mode. I could see this causing rubbing damage on trips so it was another “what to do?” moment!
Re-work the front and back walls again to add extra height – just a smidge. That seemed to work so I then added a single layer of 3mm coreflute to the sides and the roof.
Hood test #3. This showed that the width is now correct and nothing rubs in the roof / folded sides area. It also allowed me to measure the width of the coreflute needed to make sure the bottom frame rails are covered by the roof when in travel mode.
So far, so good. I unscrewed the walls and cross beams and reassembled them with glue – was I being over confident?
Then I laminated two sets of four 3mm sheets of coreflute together to give the length needed for the sides – two sets of four at a thickness of 6mm plus the glue. Getting really brave now, the next day I cut the sides to size. The glue I used for lamination – a Sikaflex product – proved still wet when cut through. Not to worry, I suspect it will dry over the next few days and the sheets are already quite firmly held together.
I will draw to a close here. The next few steps are to reattach the hood frame to Level 2, screw and glue the sides and roof onto the hood, make and attach the coreflute hood covers for the front and back walls and finally test it out again. That’s for my next report.

The hood does feel pretty flexible (flimsy?) at the moment so I am hoping it will stiffen up a bit when the coreflute is screwed and glued to the frame. I will also add some sort of stiffener at the bottom of the two sides. There is a space issue here as I can use nothing too thick or the hood will hit the wheels when travelling. The mind goes to using thicker timber or extra supports but that will add weight so, on the basis that aircraft wings are good as long as they flex, I will continue as is.
I am looking forward to testing it with an overnight camp in the backyard. Robert reports his is fine to sleep in – will I report the same?
’til next time ……………..

makes mr tired reading this!!!!!!!!!!!!!!!!!!!!!!!!!!!!!!!!!!!!!!!!!!!!!!!!!!!!
>
LikeLike
Thanks Ken. Tired, you, never !!
LikeLike
ill try to send a link of a girl doing a mini aircraft round australia
LikeLike
You have more patience than me brother, I thought the tear-drop shape was hard enough, You know what Berger Breeze used to say, “keep on keeping on” It will happened; again well done
LikeLike
Thanks Colin. I am sure each shape has its hassles. We tripped over the trailer yesterday and the front feet need replacing now! The trailer’s not ours.
LikeLike
That’s a lot of fine engineering… and re-engineering. Glad it fits! Does it feel claustrophobic? I thought the one-man tent was a bit claustrophobic the first few days, but then it started to just feel cosy.
I hate to say this, but the camper looks very dual purpose in the feature photo. Once you’re done with it, like REALLY done, it appears you could recycle it as your coffin! A box to lie in for a really long trip!
LikeLike
Crikey, that’s a thought. Ah, the problem would be I and the box would have to pass through a recycling facility. Coreflute can be easily recycled – me not so much I suspect; too toxic.
LikeLike
Looking good Tony 👍
LikeLike